A bunch of new entries all compressed into one for the months of June and July. Its all taken from forum entries so it asks questions and then answers them as I've figured them out. I ordered a bunch of parts from Walck's that I hope will enable me to get a rolling chassis back together by the fall!
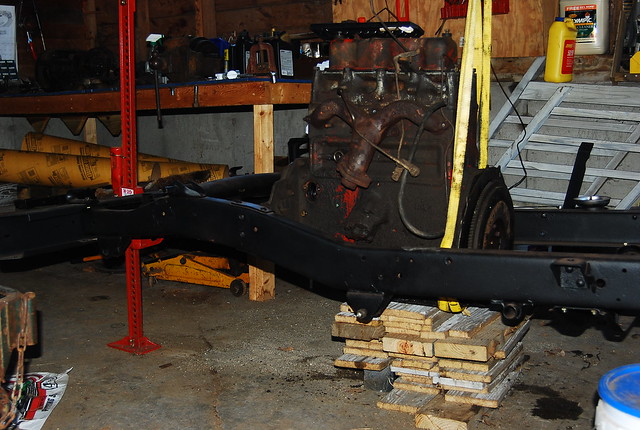
How the Mistress is currently sitting, engine propped up on scrap lumber and on her engine mounts.
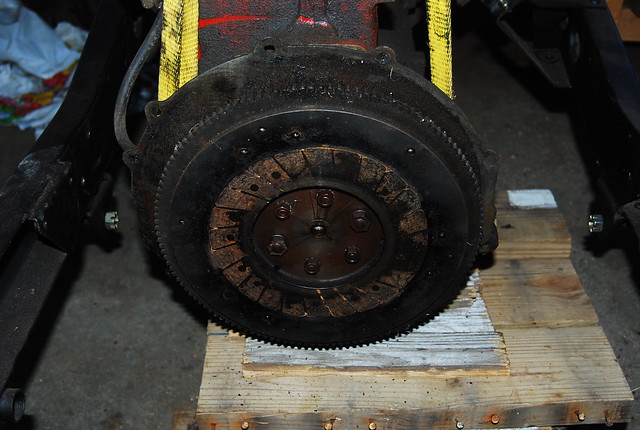
Back of the flywheel. What's involved with cleaning this up? Some light grit sandpaper for the rust spots left by the disc and degreaser? Other than the 'ghost' image left by the clutch disc, it seems in good shape, not obviously worn down or glazed, all teeth intact...
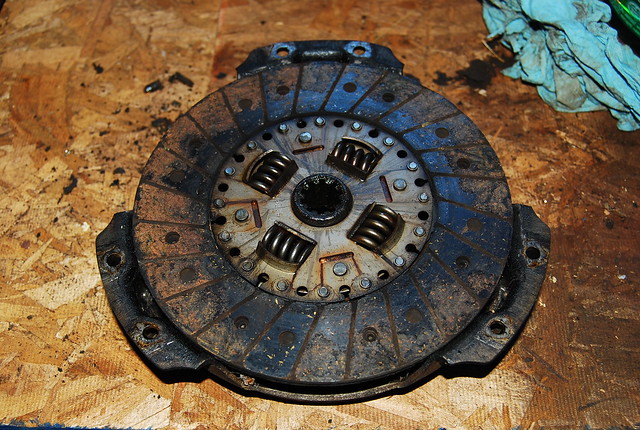
Flywheel side of the clutch disc, some wear, but I am not sure how much is too much. It DOES have a bit of grease and schmutz on it, so maybe I should just replace it?
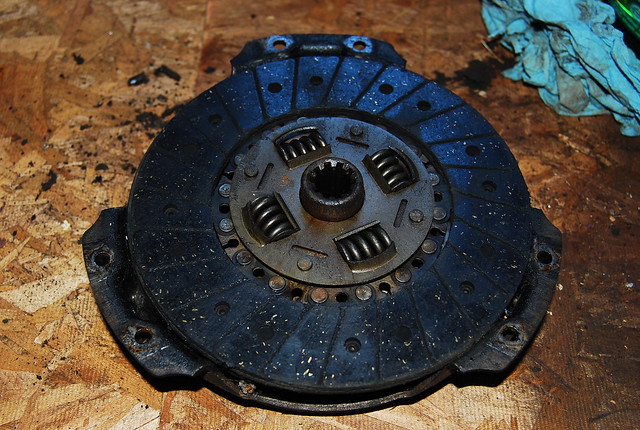
Pressure plate side, again, not much wear.
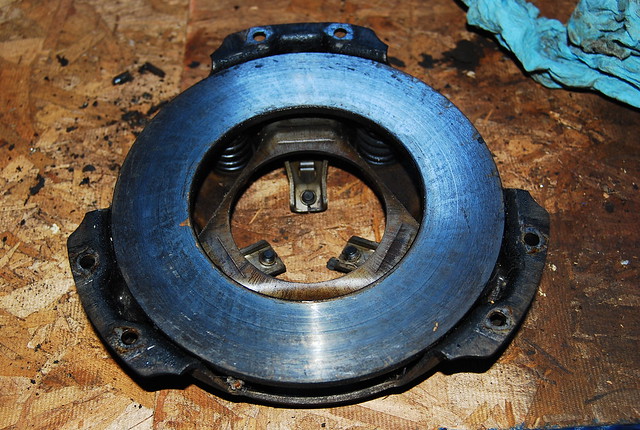
Pressure plate. Looks good to me. The three fingers all work smoothly and are hopefully adjusted fine.
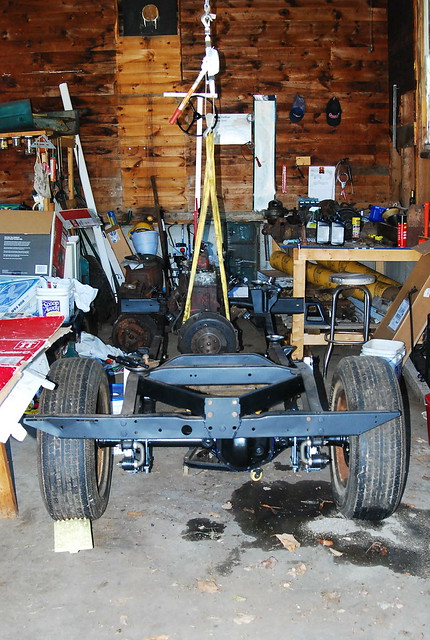
Rear view.
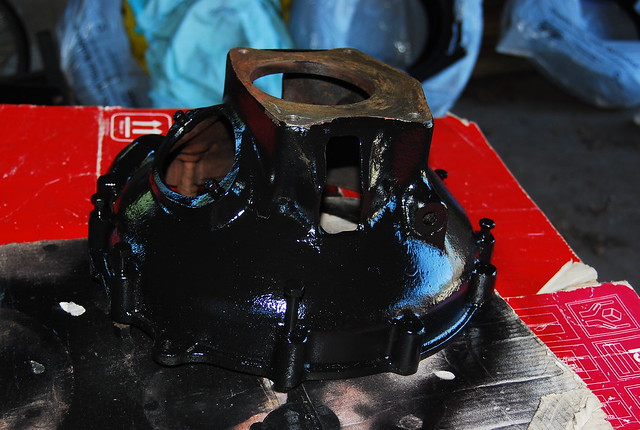
And the bellhousing that I spent some time degreasing and scraping a pound of dirt and grease from before painting.
I may as well replace the pilot bearing while I'm at right, right? And the throwout bearing seems to move pretty smoothly, but probably just another replaceable part?
So, been giving this alot of thought lately and here's roughly what I hope to accomplish this summer/fall.
First off, the Mistress is sitting on her rear axle with the engine on blocks in the rear and on the mounts in front.
I need to do the following:
1) Finish disassembling the T90, clean the accumulated 1-2" of solid dirt, mud and grease from the case, rebuild and paint it.
2)I also took the flywheel off today to try and figure out if there's an easier way of getting the front crankshaft pulley nut off without an impact wrench. I actually have a cheap-o HF one, but after a couple of uses it's broken... figures... Wish that I could afford a decent Milwaukee or something but not right now. How much can you reasonably expect to degrease a flywheel? I mean, mine isn't covered in grease where the clutch disk touches, but the exterior of that is sorta sticky to the touch like old, old dried grease has been flung up and sullied it up over the past 60 years. Other than that it isn't scored up nor does it look really bad, but should it be ground down at all? Also need to get the pilot bushing replaced using the old grease method, change the clutch and throw out bearing.
3) In general I need to scrape and degrease and eventually paint the entire engine. After that a general tune up is in order, rebuild the carb and get all the other misc. plumbing done for fuel and oil lines.
I'll need to take care of the broken studs on the exhaust manifold and I may even try it myself once I get a decent corded drill and a few new taps. My old Dewalt cordless needs its brushes replaced (I think... screeches like a banshee if you do anything other than drill a simple hole in soft wood...) I'm inspired by this writeup and I think that I can do it if I take my time with it. Otherwise I think that a startup of the engine can manage with the manifold as it is if I can get the old section of exhaust pipe out of the manifold's flange until I get to the repair and new studs. It seems pretty solidly attached to the block but who knows if there is or isn't a leak there.
Then I have to pull the head and hopefully get it all torqued down correctly. The two bolts in either corner aren't flush with the top of the head and I'm hoping that Bubba didn't try to replace two of the head bolts with two slightly longer bolts. The top of the head is also covered with some old foul oil in small pools. Bad rings or guides? Guess that I'll check compression when I can as well and possibly do a ring job with the engine installed.
4) As soon as I get the T90 back in place and the the transfer case degreased, rebuilt and painted (and with hopefully no new parts needed other than the basic gasket and oil seal set that I ordered) I need to pull the oil pan and check out the pick up, clean out the sludge and cross my fingers that the crank looks good and there isn't any other obvious damage internally. It all turns normally, the rockers all move as they should and I'm hopeful.
5) Then its a small job of getting the springs and front axle and shocks back together and the Mistress should be rolling on two tires that hold air and two that don't! And then after the fuel and oil lines, radiator (which hopefully holds water well!) and maybe even brakes (of which there was nothing to salvage but the backing plates... can't even rebuild the wheel cylinders... I hope that I 'll be able to rebuild the master though...) then I should have a rolling chassis that I can possibly drive around thew driveway!
6) Then its *only* a matter of patching up the body, the wiring, the brakes and lines, lights, new fuel tank, seat padding, new tires, gauge repairs and I'll have a street legal jeep! :D
First off, the Mistress is sitting on her rear axle with the engine on blocks in the rear and on the mounts in front.
I need to do the following:
1) Finish disassembling the T90, clean the accumulated 1-2" of solid dirt, mud and grease from the case, rebuild and paint it.
2)I also took the flywheel off today to try and figure out if there's an easier way of getting the front crankshaft pulley nut off without an impact wrench. I actually have a cheap-o HF one, but after a couple of uses it's broken... figures... Wish that I could afford a decent Milwaukee or something but not right now. How much can you reasonably expect to degrease a flywheel? I mean, mine isn't covered in grease where the clutch disk touches, but the exterior of that is sorta sticky to the touch like old, old dried grease has been flung up and sullied it up over the past 60 years. Other than that it isn't scored up nor does it look really bad, but should it be ground down at all? Also need to get the pilot bushing replaced using the old grease method, change the clutch and throw out bearing.
3) In general I need to scrape and degrease and eventually paint the entire engine. After that a general tune up is in order, rebuild the carb and get all the other misc. plumbing done for fuel and oil lines.
I'll need to take care of the broken studs on the exhaust manifold and I may even try it myself once I get a decent corded drill and a few new taps. My old Dewalt cordless needs its brushes replaced (I think... screeches like a banshee if you do anything other than drill a simple hole in soft wood...) I'm inspired by this writeup and I think that I can do it if I take my time with it. Otherwise I think that a startup of the engine can manage with the manifold as it is if I can get the old section of exhaust pipe out of the manifold's flange until I get to the repair and new studs. It seems pretty solidly attached to the block but who knows if there is or isn't a leak there.
Then I have to pull the head and hopefully get it all torqued down correctly. The two bolts in either corner aren't flush with the top of the head and I'm hoping that Bubba didn't try to replace two of the head bolts with two slightly longer bolts. The top of the head is also covered with some old foul oil in small pools. Bad rings or guides? Guess that I'll check compression when I can as well and possibly do a ring job with the engine installed.
4) As soon as I get the T90 back in place and the the transfer case degreased, rebuilt and painted (and with hopefully no new parts needed other than the basic gasket and oil seal set that I ordered) I need to pull the oil pan and check out the pick up, clean out the sludge and cross my fingers that the crank looks good and there isn't any other obvious damage internally. It all turns normally, the rockers all move as they should and I'm hopeful.
5) Then its a small job of getting the springs and front axle and shocks back together and the Mistress should be rolling on two tires that hold air and two that don't!
And then after the fuel and oil lines, radiator (which hopefully holds water well!) and maybe even brakes (of which there was nothing to salvage but the backing plates... can't even rebuild the wheel cylinders... I hope that I 'll be able to rebuild the master though...) then I should have a rolling chassis that I can possibly drive around thew driveway!6) Then its *only* a matter of patching up the body, the wiring, the brakes and lines, lights, new fuel tank, seat padding, new tires, gauge repairs and I'll have a street legal jeep! :D
Ok, I finally had the time to start with tearing into the T90 today and it came apart (mainly...) as slick and simple as butter... that is once I took a better look at things and took my time. That problem that I was having with the main shaft was due to not having taken out the two bolts for the oil collector. Once that was done the countershaft came out easily, dropped the cluster gear and with a little finagaling with the oil collector the main shaft came right out! Between Doug's write-up and this one- http://www.cj-3a.com/T-90%20Rebuild.htm by Rick Stivers its all started to make some sense. I ran into a bit of trouble with having to remove some washers from the end of the cluster gear in order to be able to move it around a bit more so that I could get the oil collector out and then the mainshaft. Now for the big problem, the reverse idler gear shaft... I'm using a 3/4" wooden dowel instead of a brass punch but I cannot for the life of me figure out how to drive it out. You cannot get at it in a straight line and I've tried the C-clamp idea that Stivers suggests too, but so far, nothing... Wish me luck with a bit of sleep tonight that I may have more luck with it.
A friend of mine on my forum suggested a 1/2" socket extension and I'll be damned if it didn't work perfectly. I tapped it a few times and moved it about 1/8". I was hesitant about moving it out the rest of the way with the extension as I didn't want to cock it and jam it by hammering on it at an angle. It came out the rest of the way with the dowel as easily as the countershaft. Just a matter of getting it started as the original idea man had said!
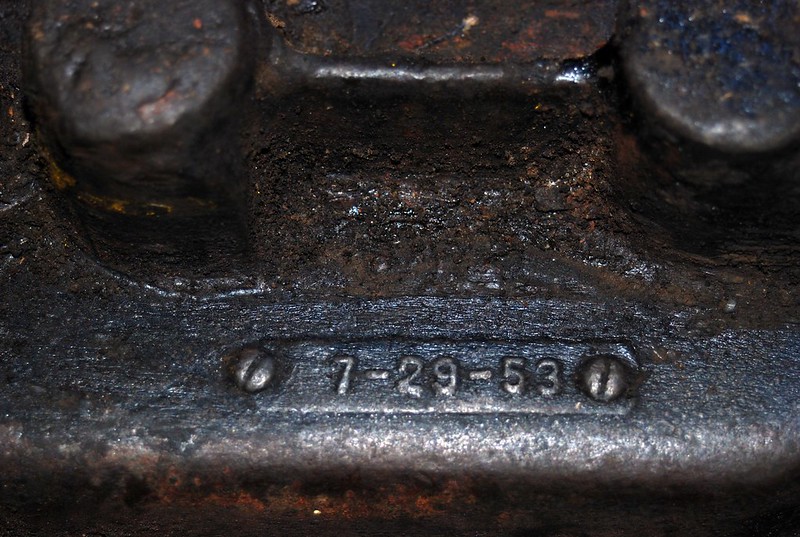
I started getting alot of work done on the T90 today and one of the gems that I uncovered was the original casting date for the case... July 29, 1953! How about that!?! A week from today it was cast 59 years ago! Pretty cool! I love dates on things like this and was hoping to find some frame numbers when I cleaned up the frame, but this almost makes up for it. I didn't know that these existed until I chanced across a reference to it on the 2A Page here. As the OP said, the fake screwheads are a nice touch!
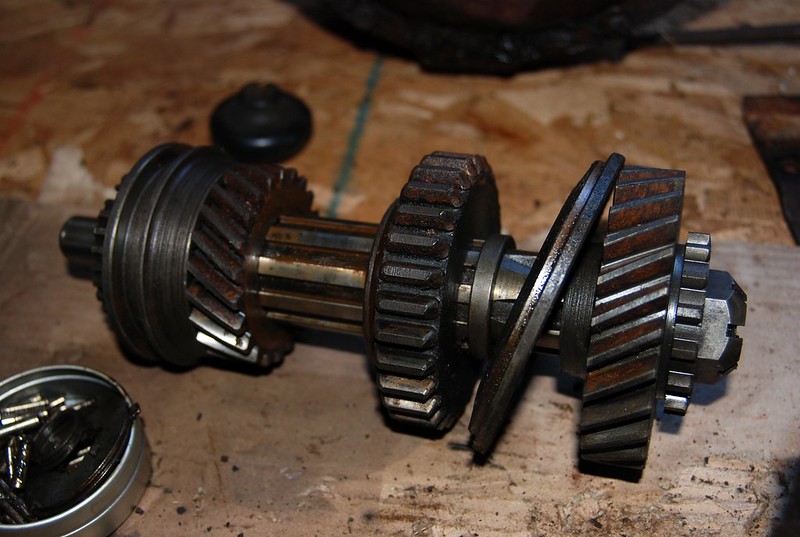
The mainshaft gears. Mainly a bit of surface rust but you can see some wear on the large gear's right hand teeth on the sliding gear or the 1st/Reverse Sliding Gear as Stivers refers to it here- http://www.cj-3a.com/T-90%20Rebuild.htm. I think that it's related to the excessive wear on the countershaft/ cluster gear set.
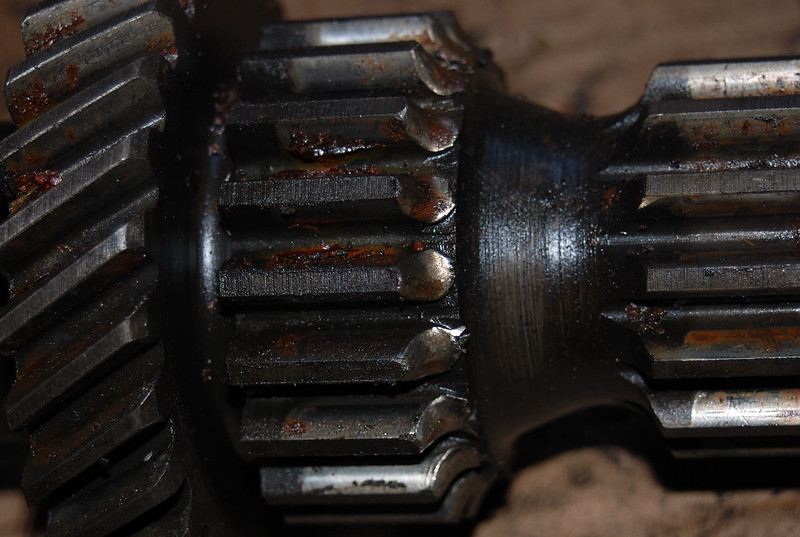
And speaking of which...
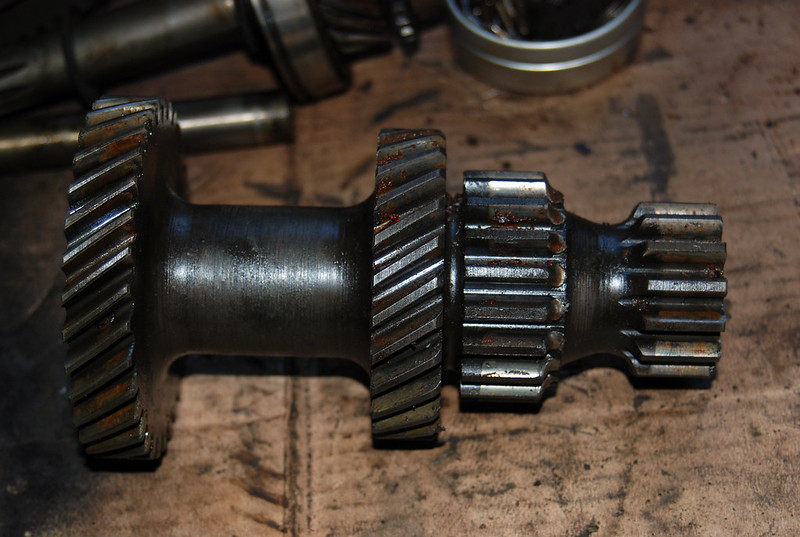
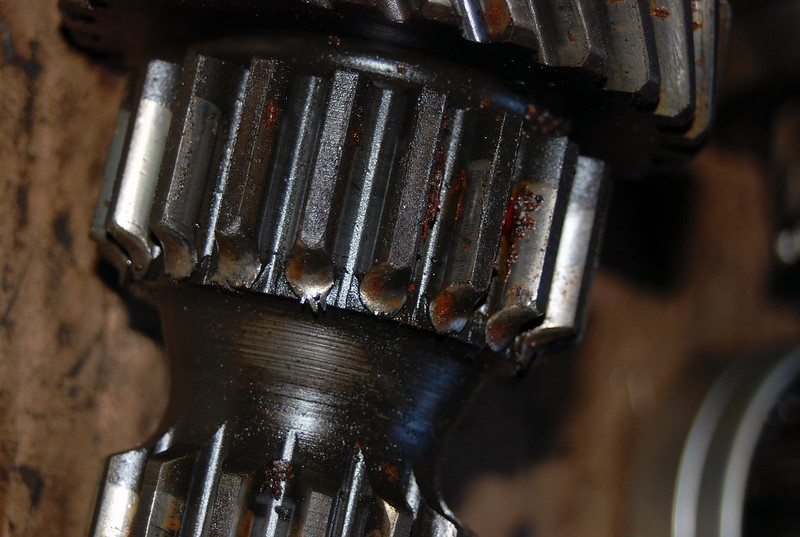
Anyone have any experience with how much wear is too much. Stivers says 3/8"... Guess that its time to break out the file and dress 'em up a bit.
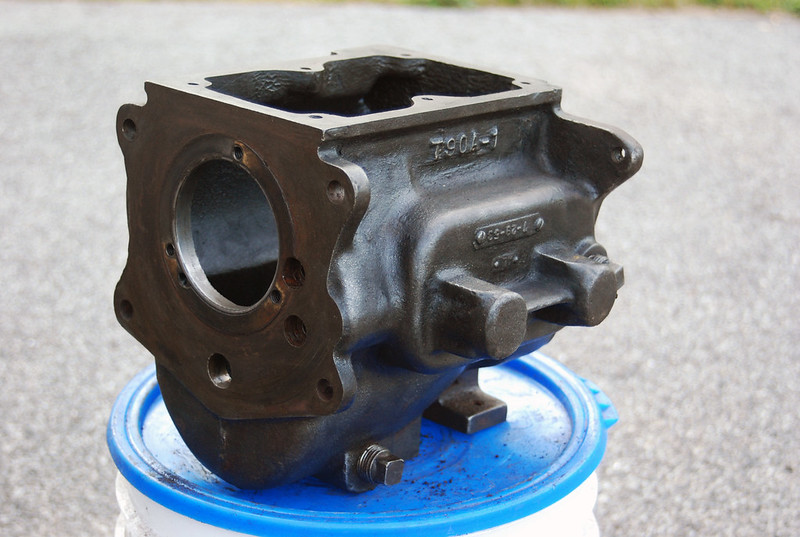
Got nice and dirty with the grinder and wire wheel. Its messy but does a nice and quick job of thick accumulated grease and dirt. A bit of Simple Green and a couple of shop rags later and its looking almost ready for paint! Still gotta get into the corners and niches with an old toothbrush and then it'll be Rustoleum time!
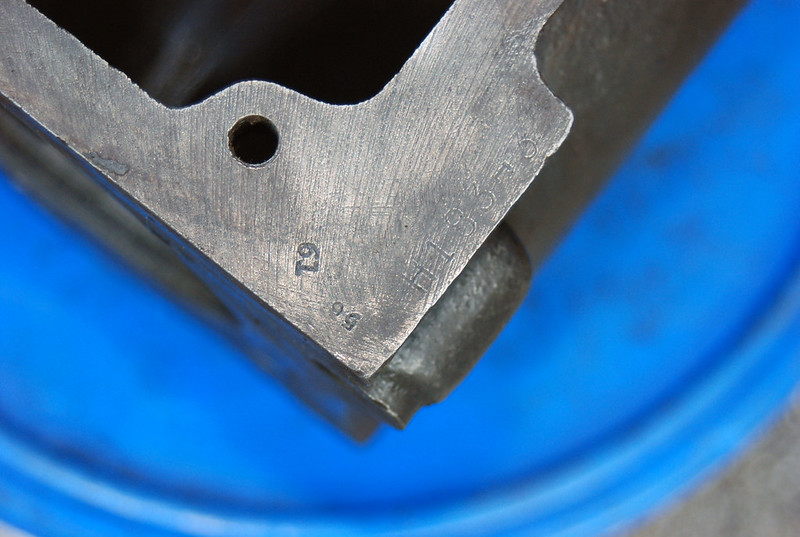
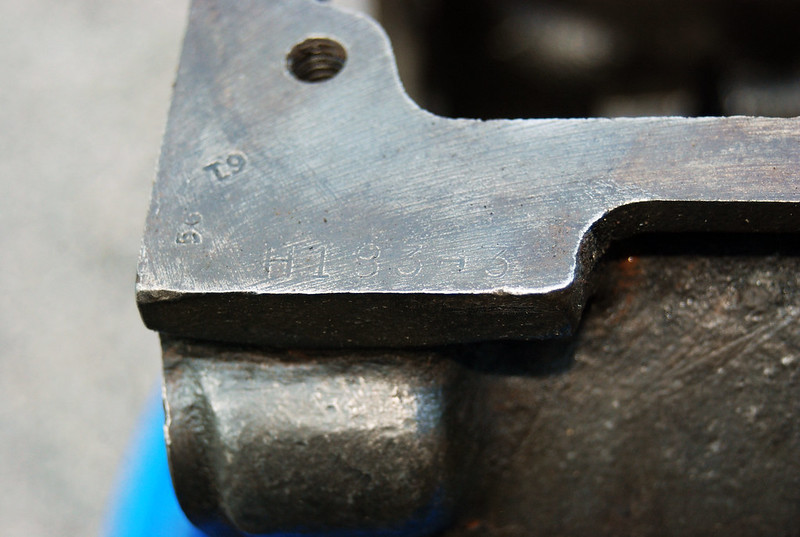
And another little mystery. Anyone have an idea about the stamped numbers on the lip of the top plate? "56", "61" and "H183-3"


