This-Old-Jeep.com's Zazzle Marketplace


See more personalized gifts from Zazzle.

Sunday, November 29, 2009

Halfway There!

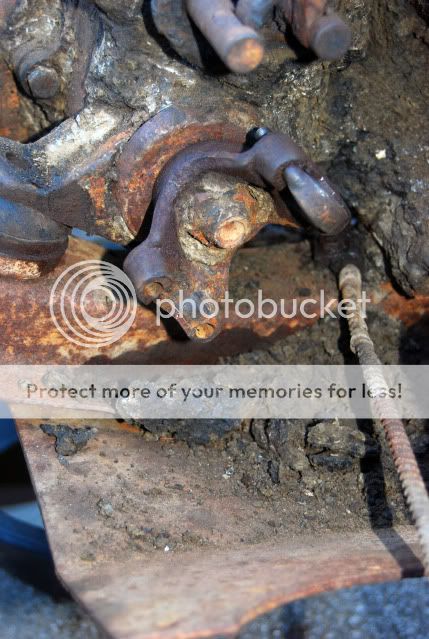
This is how the Mistress sits tonite. Minus one spring and four more rusty U bolts & nuts to tackle tomorrow. :) Jeez, I'm dirty, but pretty happy :D

As of 11/29/09


As of 11/29/09

Getting the Engine off the Frame and the T90 and Bellhousing Out

So, I've been working on lots of things simultaneously these past few days all leading up to getting the engine off the frame and the frame stripped.

Skidplate Down


Got the skid plate off. Looks VERY rusty, but still think both it and the crossmember, trans support are salvageable. When I start cleaning them, I'll get a better idea.

Photobucket


Everything Down


Finally after a whole lotta sweating and cursing, I got the bellhousing and T90 down. Glad to have had the comealong, it wasn't too heavy, but it was pretty awkward all together as one piece. I had problems at first, I think due to some rust stubbornly holding on between the tip of the mainshaft and the flywheel. Also, once I adjusted the angles between the jackstand that I had the T90 set on and the engine itself, it worked right out easily.

View From Underneath


This is how she sits now, f head sitting on scrap 2X6's and off the engine mounts. I plan on getting to the front axle now, remove the whole thing and then lift and walk the frame backwards and over the f head.

Mouse Condo


A mouse condo inside the bellhousing for who knows how many generations of mice.

Old Motor ounts


The motor mounts go on the disabled/ to be replaced list...

Wednesday, November 25, 2009

Pulling the Transfer

I finally found that last bolt hidden beneath another inch of dirt and grease build up. It was like stumbling on a lost treasure when I found it!


Photobucket


I love nice clean gears that have been hidden from the light of day for over 50 years!


Photobucket


A view through the PTO cover.


Photobucket


After... this is some of the accumulated dirt and grease that I had to chisel through to get at that last bolt.


Photobucket


How NOT to wire the transmission's mainshaft. I needed to string the wire behind the two gears that its in front of and behind that gap, the space in between the lip of the gap where the shifter fork sits. I slowly pulled the transfer out and the joyful tinkling of needle bearings falling into the tranny case greeted me. Live and learn. I'd feel bad if I weren't already rebuilding the T90.

Photobucket


The Spicer 18 on the workbench


On the workbench at last!
:edit: Oh yeah, who can recommend a good degreaser? :)

Monday, November 23, 2009

Separating the D18 from the T90 roadblock

I'm about one step from removing the transfer case, but there's something holding me back and I can't figure out what it is. I have a total of eight bolts removed from the bodies of the transfer and transmission and the bolt going through the crossmember. I have the clamp holding down the emergency brake cable onto the crossmember removed. (I can't get the cable removed from the arm as I just don't have enough room to get in there and everything is rusted together...) I have the cover on the back of the transfer removed and the bolt and washer and one total gear that consists of a large and a small gear in one unit removed. I tried taking the T90 shifter top case off just in case that had something to do with it. I've tried shifting the transfer levers into different positions (should it be out or in and in neutral, I'd guess?). Does it matter? Its a Dana 18 twin stick and something is up with it as I have only two positions on the low and high stick, but like I said, don't know if that has anything to do with it or not?
I've tried gently prying apart the case halves with a thin bladed screwdriver and have got it maybe 1/16" separated, but after that it feels almost like there is another bolt somewhere that I'm missing. I know that there is one bolt (that IS removed) in between the transfer shifter hump and the tranny shifter hump, bit is there another bolt hiding under all the dirt and grease that has built up there? I had to literally chisel through it to get to the one bolt.
About the only thing that I haven't tried is to hoist it up with the comelong and then try to pry the case halves apart. ANY advice would be appreciated. :D My goal is to have the running gear out of the frame by Thanksgiving.

Sunday, November 22, 2009

Ok, finally a nice day again and I puttered around. Started cleaning and grinding the rust and dirt from the inside of the frame rails (FUN! :(), tried to remove the skid plate. One bolt came off, the others three are rusted little nubs that I'll have to cut off and generally chipped away at the hardened mud and grease surrounding the transfer and transmission cases. Its literally like trying to chisel away stone and trying to find a T90 and D18 and their bolts. But I got to all the bolts (I think...). Tried hoisting the transfer with the comealong in the rafters and it doesn't budge. I practically pick up the jeep. Can I be missing a bolt somewhere? I removed four facing forward and another four facing the opposite direction to the back. I have to take a closer look in an old service manual, but does anyone know offhand how many bolts I'm supposed to be dealing with?

Photobucket


Here's what I'm dealing with as far as the mud and grease mess goes.

Photobucket


Photobucket


And I tried a small section of the rear crossmember with a Rustoleum pickup bed spray that I think that I like alot for a topcoat on the frame. It has texture and seems to be pretty durable.

Sunday, November 15, 2009

Thoughts on the next steps.

Got a bit more done today, nice and in the low 60's, but pretty damp yet from all the rain we got yesterday. I took out the front driveshaft and plan on approaching things like this next:
1: Drain the transfer and transmission cases.
2: Position the frame under the come along up in the rafters in the barn and maybe do a bit of bracing up in the rafters as my friend Joe suggested awhile ago.
3: Support the transfer with a tow strap or two and separate it from the transmission and get it out with the help of the come along.
4: Remove the skid plate.
5: Support the engine with blocks of wood beneath the oil pan and then try to muscle out the T90 again with the help of the come along if the rafters look like they'll support at least part of the weight.
6: Once the transmission is out, remove the motor mounts and hope that the engine will just sit on the wood blocks while I remove the axles (or maybe just one axle) and then roll and lift the frame OVER the engine and voila, a rolling frame once I get the springs and axles clean and primed and painted.
Sounds like a plan? Anyone have any other ideas or suggestions? I may yet rent a cherry picker, but its not really even in the cards financially just now until I have to buy a stand and get the replacement f-head on the stand.

Friday, November 13, 2009

Rear Crossmember Work

After posting about removing the rear crossmember (and I may yet...) I decided to try to get it straight(er...) :) Tried gently tugging at it with a tow strap on the back of my TJ... may have helped a teeny bit, but no big result. Then with a combination of various shade tree mechanic techniques and what I had at hand, I did get it quite a bit straighter than it was. I used a BFH, a wrecking bar, a pipe wrench and then finally a big 3/4" steel plate c-clamped on as a guide to hammer it flat(er...) with the BFH.

Photobucket
Before...

Photobucket


Photobucket


Photobucket


Photobucket


Photobucket
At least, its straighter than the front bumper (that's going to be replaced...) :D

Photobucket

Photobucket
And after...

Photobucket
Here you can sort of see what I had to begin with on her first day home...

Wednesday, November 11, 2009

Getting There...

More done today. With the wife home and the boys safely ensconced inside watching Sesame Street or taking a nap, I frittered away 4 hours outside before I knew it. Walter did help me for awhile, but decided to go inside for hot cocoa after the first hour.

Photobucket


Photobucket


The C-channel out of the rear crossmember.

Photobucket


The crossmember is luckily not too bad. Most of the rust that fell away came from the C-channel brace.

Photobucket


One of the two rust through.

Photobucket


The sizeable pile of rust from knocking out the C-channel with a dead blow hammer and a hammer and chisel.

Photobucket


Finally got around to looking for the engine block serial number- 4J33563

There's more done, but I'm going to paint tomorrow and take a few more pics.

I also decided to shoot a quick video using, yes, the MacBook laptop and its webcam. Wasn't easy trying to figure out what I was shooting, but hey it was fun! :wink:

And More Work...

Another nice fall day and so I got something done on her. Ground off the old bolts holding on some miscellaneous garbage on the rear cross member. Starting to look cleaner. I found these metal plates on both sides of the bolt going through the cross member holding on the right side diagonal brace of the tow hitch. Not sure why they were there. Also bent out a bit of the dent in the left side of the cross member/ bumper, but I gotta get some heat and a wrecking bar to it again.


Photobucket


Photobucket


Photobucket


Photobucket


Photobucket


Photobucket


Monday, November 2, 2009

More Work

Another nice day and another couple of hours of work before I leave to go drive a bus. I know, I know. I won't post every little bit of work that I get done, but two days in a row after such a long time of not having the time to do anything that I just had to.

Photobucket


Nov 2 2009


Nov 2 2009


I love seeing bits of solid historical evidence like this weld spatter alongside one of the body mounts.

Nov 2 2009


Nov 2 2009


Nov 2 2009


Nov 2 2009


I never really noticed this until today, but you can see the remnants of the beautiful Woodstock Green in this wheel.

Nov 2 2009


Nov 2 2009


Nov 2 2009

Sunday, November 1, 2009

Beginning to Prep the Frame

It was a warm 60 degree day and so following my idea of getting the Mistress done on the cheap, I got some priming done. Cleaned up the old paint, rust and mud with a wire wheel and cup on my cheapo Harbor Freight die grinder and it was Rustoleum Rusty Metal Primer on the front crossmember and battery tray. I'll get more done as the weather allows, but I'm sure the Mistress appreciated the sun today after I blew up her tires and pushed her out of the barn. I was thinking about POR15, but this will be faster and cheaper as money is pretty darn tight right now.


Photobucket


Photobucket


Photobucket


Photobucket